Quick answer: To build DIY drip irrigation, pierce 4-6 small holes in the lower half of a plastic bottle, fill it with water, and bury it neck-deep beside your plant with holes facing the roots. One bottle waters a plant for 1-3 days and cuts water use by 30-50% compared to surface watering.
Watering is the single biggest reason terrace gardens fail — too little and plants wilt, too much and roots rot, and a weekend away can wipe out months of effort. The fix is brilliantly simple and almost free: a DIY drip irrigation system made from recycled plastic bottles. It delivers water slowly to the roots, saves water, and keeps plants happy even while you travel. Here's how to build one in minutes.
Why Drip Irrigation Works So Well
Drip irrigation releases water slowly and directly into the soil at the root zone, instead of splashing it across the surface where most evaporates. This means deeper roots, healthier plants, far less water wasted, and fewer fungal problems. In a water-conscious city like Chennai, a drip setup can cut your garden's water use dramatically — and using plastic bottles turns waste into a useful tool.
What You'll Need
- Used plastic bottles (500 ml to 2 litres, depending on pot size)
- A nail, push pin, or thin drill bit to make holes
- A lighter or candle (to heat the nail for clean holes)
- Optional: cotton wick or cloth for the wick method
Method 1: The Buried Bottle Drip (Easiest)
- Make the holes. Heat a nail and pierce 4–6 small holes around the lower half and base of the bottle. Smaller holes mean slower drip.
- Test the flow. Fill the bottle and watch the drip rate. If it empties in minutes, your holes are too big.
- Bury it. Dig a hole next to your plant and bury the bottle up to its neck, holes facing the root zone.
- Fill and refill. Loosen the cap slightly to control air flow and slow the drip. One bottle can water a plant for 1–3 days.
Method 2: The Inverted Bottle Drip
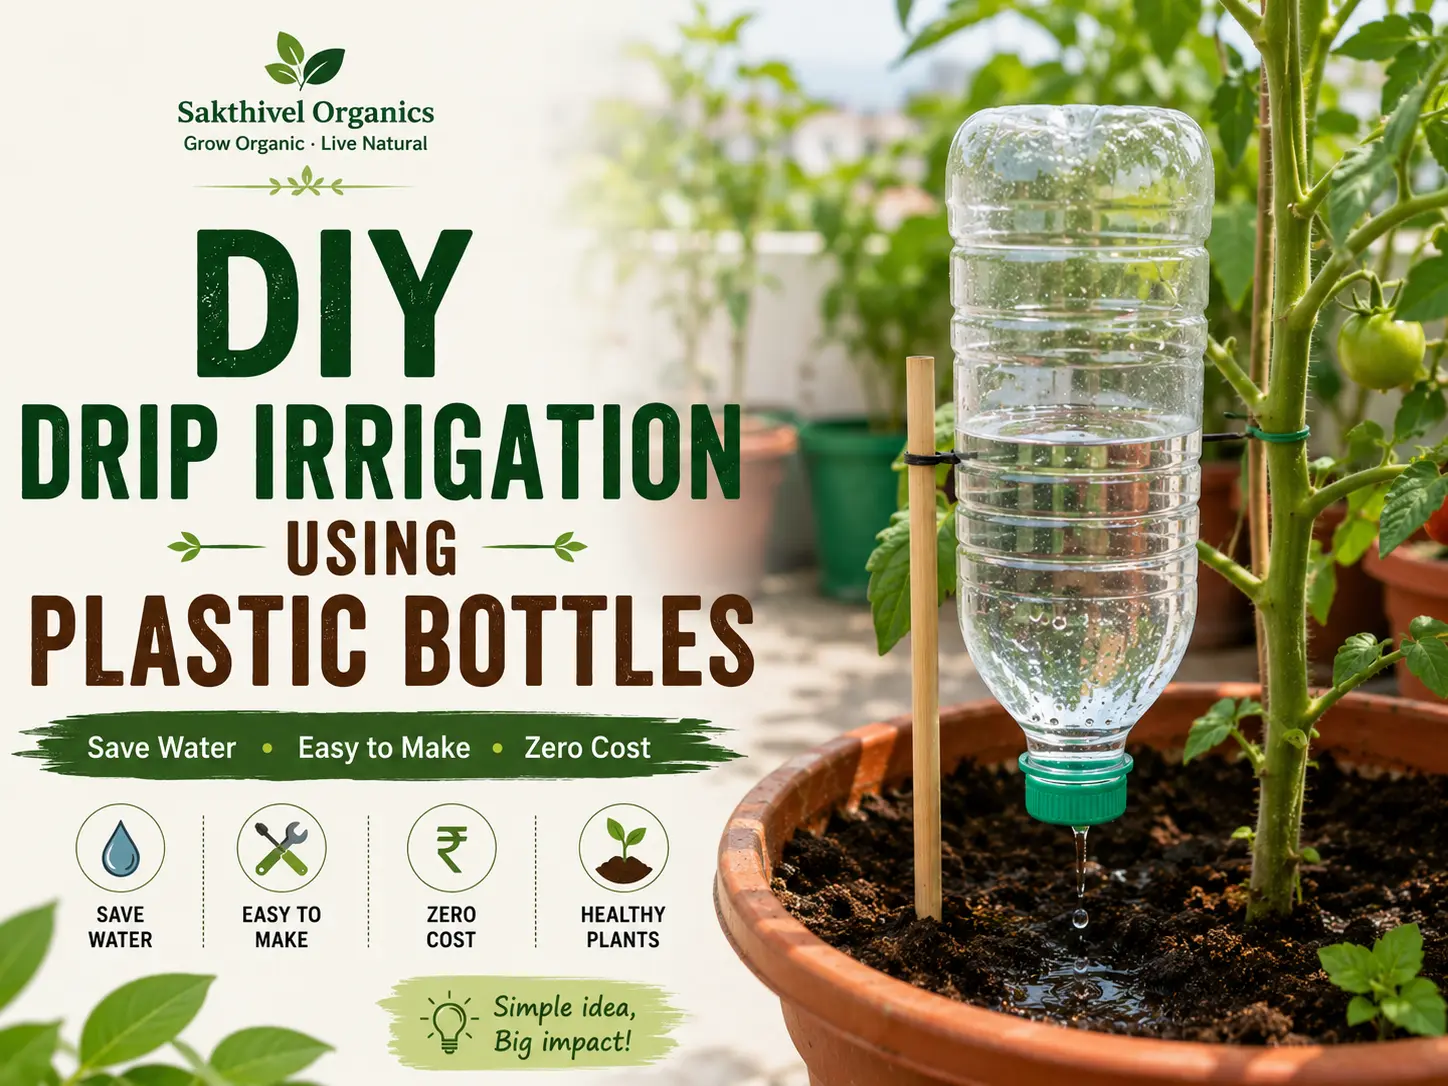
- Make 2–3 tiny holes in the bottle cap.
- Fill the bottle with water and screw the cap back on.
- Invert it and push the neck a few inches into the soil beside the plant.
- Water seeps out slowly as the soil dries. Great for larger pots and grow bags.
Method 3: The Wick System (For Travel)
For longer trips, run a cotton wick or strip of cloth from a water reservoir (a bucket or large bottle) into the soil of each pot. Capillary action draws water up the wick as the soil dries, keeping plants moist for a week or more. Place the reservoir slightly higher than the pots for the best flow.
Tips for the Best Results
- Match drip rate to the plant: Thirsty plants like tomatoes and chillies need faster drip; succulents and herbs need slower.
- Use bigger bottles for bigger pots: A 2-litre bottle suits a large vegetable container; 500 ml is fine for small herb pots.
- Mulch on top: A layer of dried leaves or coco-peat slows evaporation and makes your drip last longer.
- Keep holes clear: Check occasionally for clogging from soil or algae.
- Combine with the season: Reduce or pause drip during the monsoon.
Going Away? Keep Your Garden Alive
Before a trip, set up buried bottles or a wick system for every pot, give everything a deep watering, move pots into partial shade, and group them together to raise humidity. With this combination, most terrace gardens survive a week or longer unattended.
Scaling Up: Watering a Whole Terrace
Once you've mastered single bottles, scale the idea cheaply. Connect several bottles to a raised reservoir bucket using old IV tubing or thin hose, with a tiny dripper at each pot — gravity does all the work. Gardeners who want to go further can try the ancient olla method: bury an unglazed clay pot up to its neck near your plants, fill it with water, and the porous clay seeps moisture into the soil. Clay ollas last for years and are even more efficient than plastic bottles.
Pairing Drip Irrigation with Smart Watering Habits
A drip system works best alongside good judgement. Group thirsty plants together so one reservoir serves them. Always water deeply and less often — deep watering drives roots downward, making plants more resilient. Check your bottles every couple of days at first to learn how fast each empties, then settle into a refill rhythm. During the monsoon, lift or empty the bottles so plants aren't drowned by drip plus rain.
An Eco-Friendly Win for Your Garden and the Planet
Every bottle you repurpose is one less piece of plastic heading to a landfill, and drip systems can use a third to half less water than surface watering — which matters enormously in a city that faces water shortages. Healthier, deeper-rooted plants also need fewer interventions. It's a perfect example of the "grow organic, live natural" philosophy: a free, low-tech solution that reduces waste, conserves water, and produces stronger plants all at once.
Frequently Asked Questions
How long does one bottle last? Depending on hole size and pot, a 1–2 litre bottle typically waters a plant for 1–3 days.
Does bottle drip really save water? Yes — delivering water at the roots can cut usage by 30–50%.
Will the holes clog? Occasionally. Use a pin to clear them.
Can this replace daily watering entirely? For most plants, yes during normal weeks; in peak summer you may need to refill more often.
Final Thoughts
A handful of recycled bottles can transform how you water your terrace garden — saving water, saving time, and keeping your plants thriving even when life gets busy. Try the buried-bottle method on a couple of pots this week, and you'll soon want it on every plant you grow.
🎓 Want a terrace garden that basically runs itself? Our மாடித்தோட்டம் Terrace Gardening Course (Tamil, 90-day program) covers watering systems, seasonal care and low-maintenance layouts for busy gardeners.
🌿 Grow Organic · Live Natural — with Sakthivel Organics
Follow us for daily gardening tips, videos and updates:
🛋 Shop organic seeds, tools and garden essentials at sakthivelorganics.com/products